Have you ever wanted to look at the stars but wanted to stay inside where it is warm? Yup, us too. Allsky cameras are a great way to watch the stars as they pass overhead without bundling up against the cold or drinking a vat of coffee so you can stay up all night.
The software.
There was only one choice for us: Team Allsky. I had read a post on Instructables detailing the original build, was enamoured of the concept, and knew we would add this to our project list. We also have an unlimited bandwidth web hosting plan used for several other projects and we will add a web domain specific to complete the hosting of the public version of the allsky software.

The compute engine.
In the project box, we had a Raspberry Pi 4B that was once used to run a camera system. The old case was pretty, but the cooling fans were seriously terrible. To simplify the setup, we wanted to switch to a passive cooling case and happily found this one from Akasa. Most of our Raspberry Pi projects do not require large SD Cards, but we wanted to ensure we had plenty of room to store awesome pictures and videos, so we added a 128GB SanDisk card.

Project boxes.
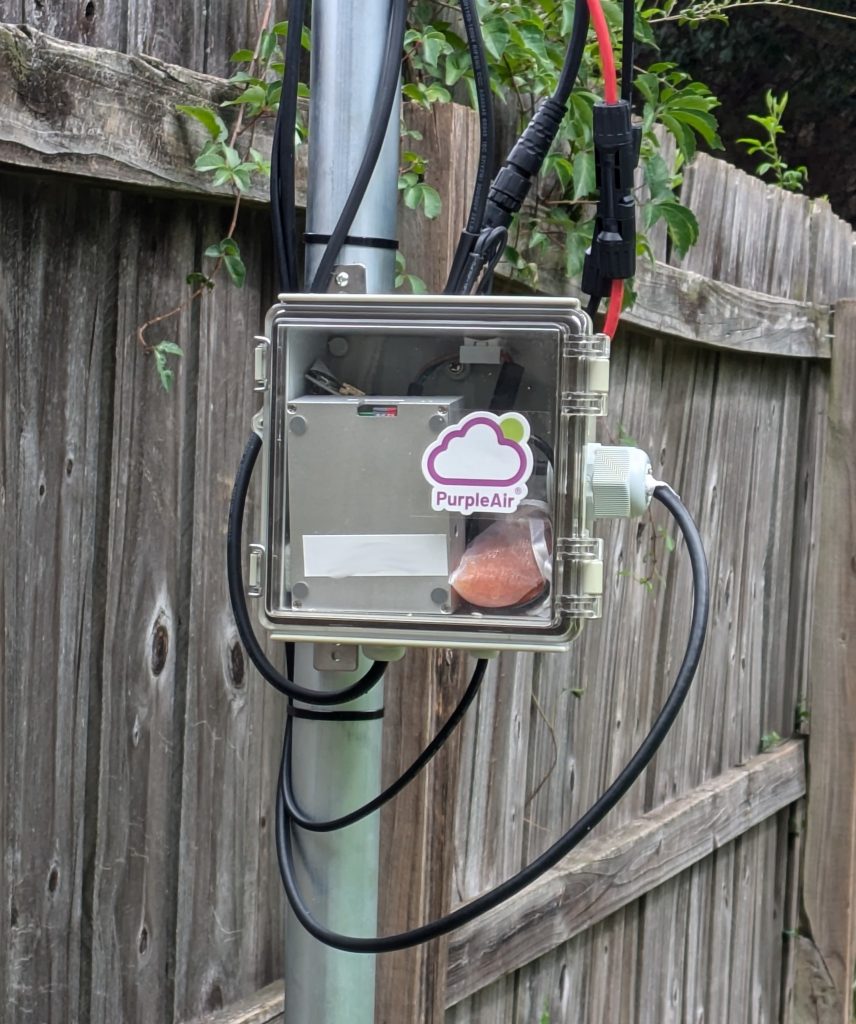
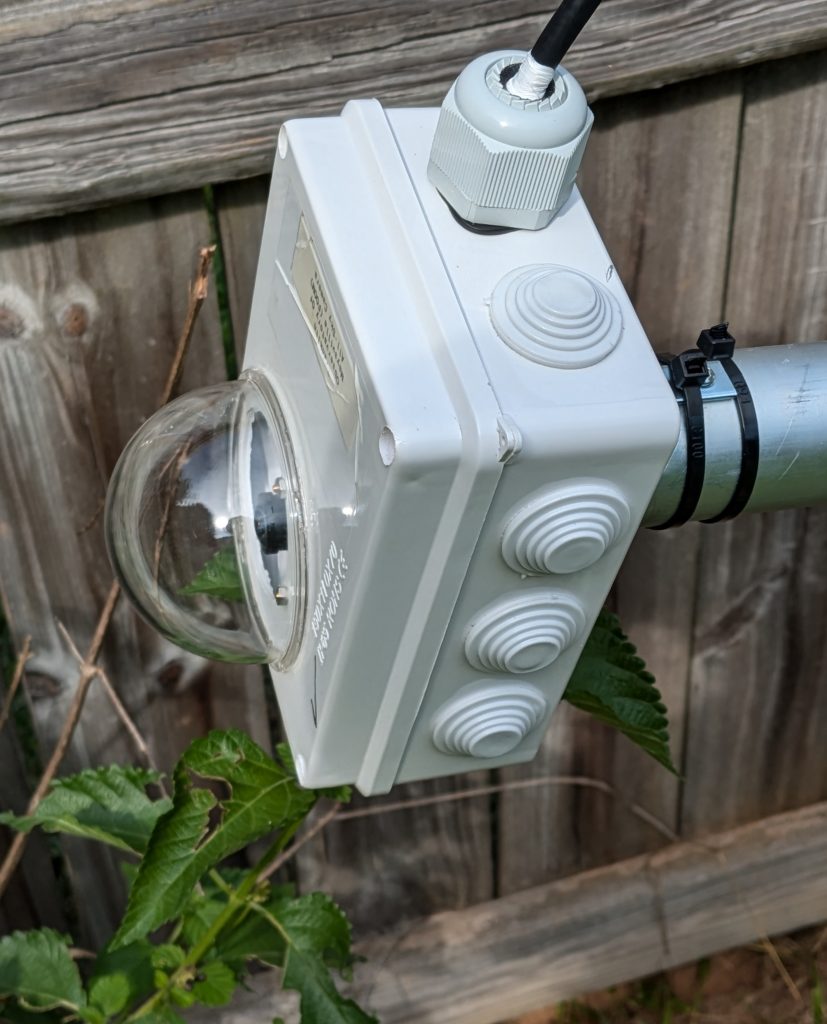
We knew we did not want the camera and the Raspberry Pi to live in the same box, nor did we want to pull down the camera every time the SD card required replacement. We decided to separate the two. We used a waterproof junction box for the camera box and a hinged junction box for the Raspberry Pi. We cut a hole in the top of the junction box so the camera could see the outside world and then attached this camera dome. We included a healthy dose of desiccant beads to help keep things dry inside these boxes. How do you get cables into these project boxes? The answer is cable glands.
The camera and lens.
The whole point of this project is to take pictures of the sky, so we have to have a good camera. We choose the Raspberry Pi High-Quality camera. We added this 2.7mm wide-angle lens that matched the camera’s size to get that whole-sky view. The camera normally connects to the Raspberry Pi with a ribbon cable. With the camera at the top of the pole and the Raspberry Pi towards the bottom, we used an HDMI cable and a CSI to HDMI Cable Extension to connect the two. We used a pair of corner braces to connect the camera box to the pole.
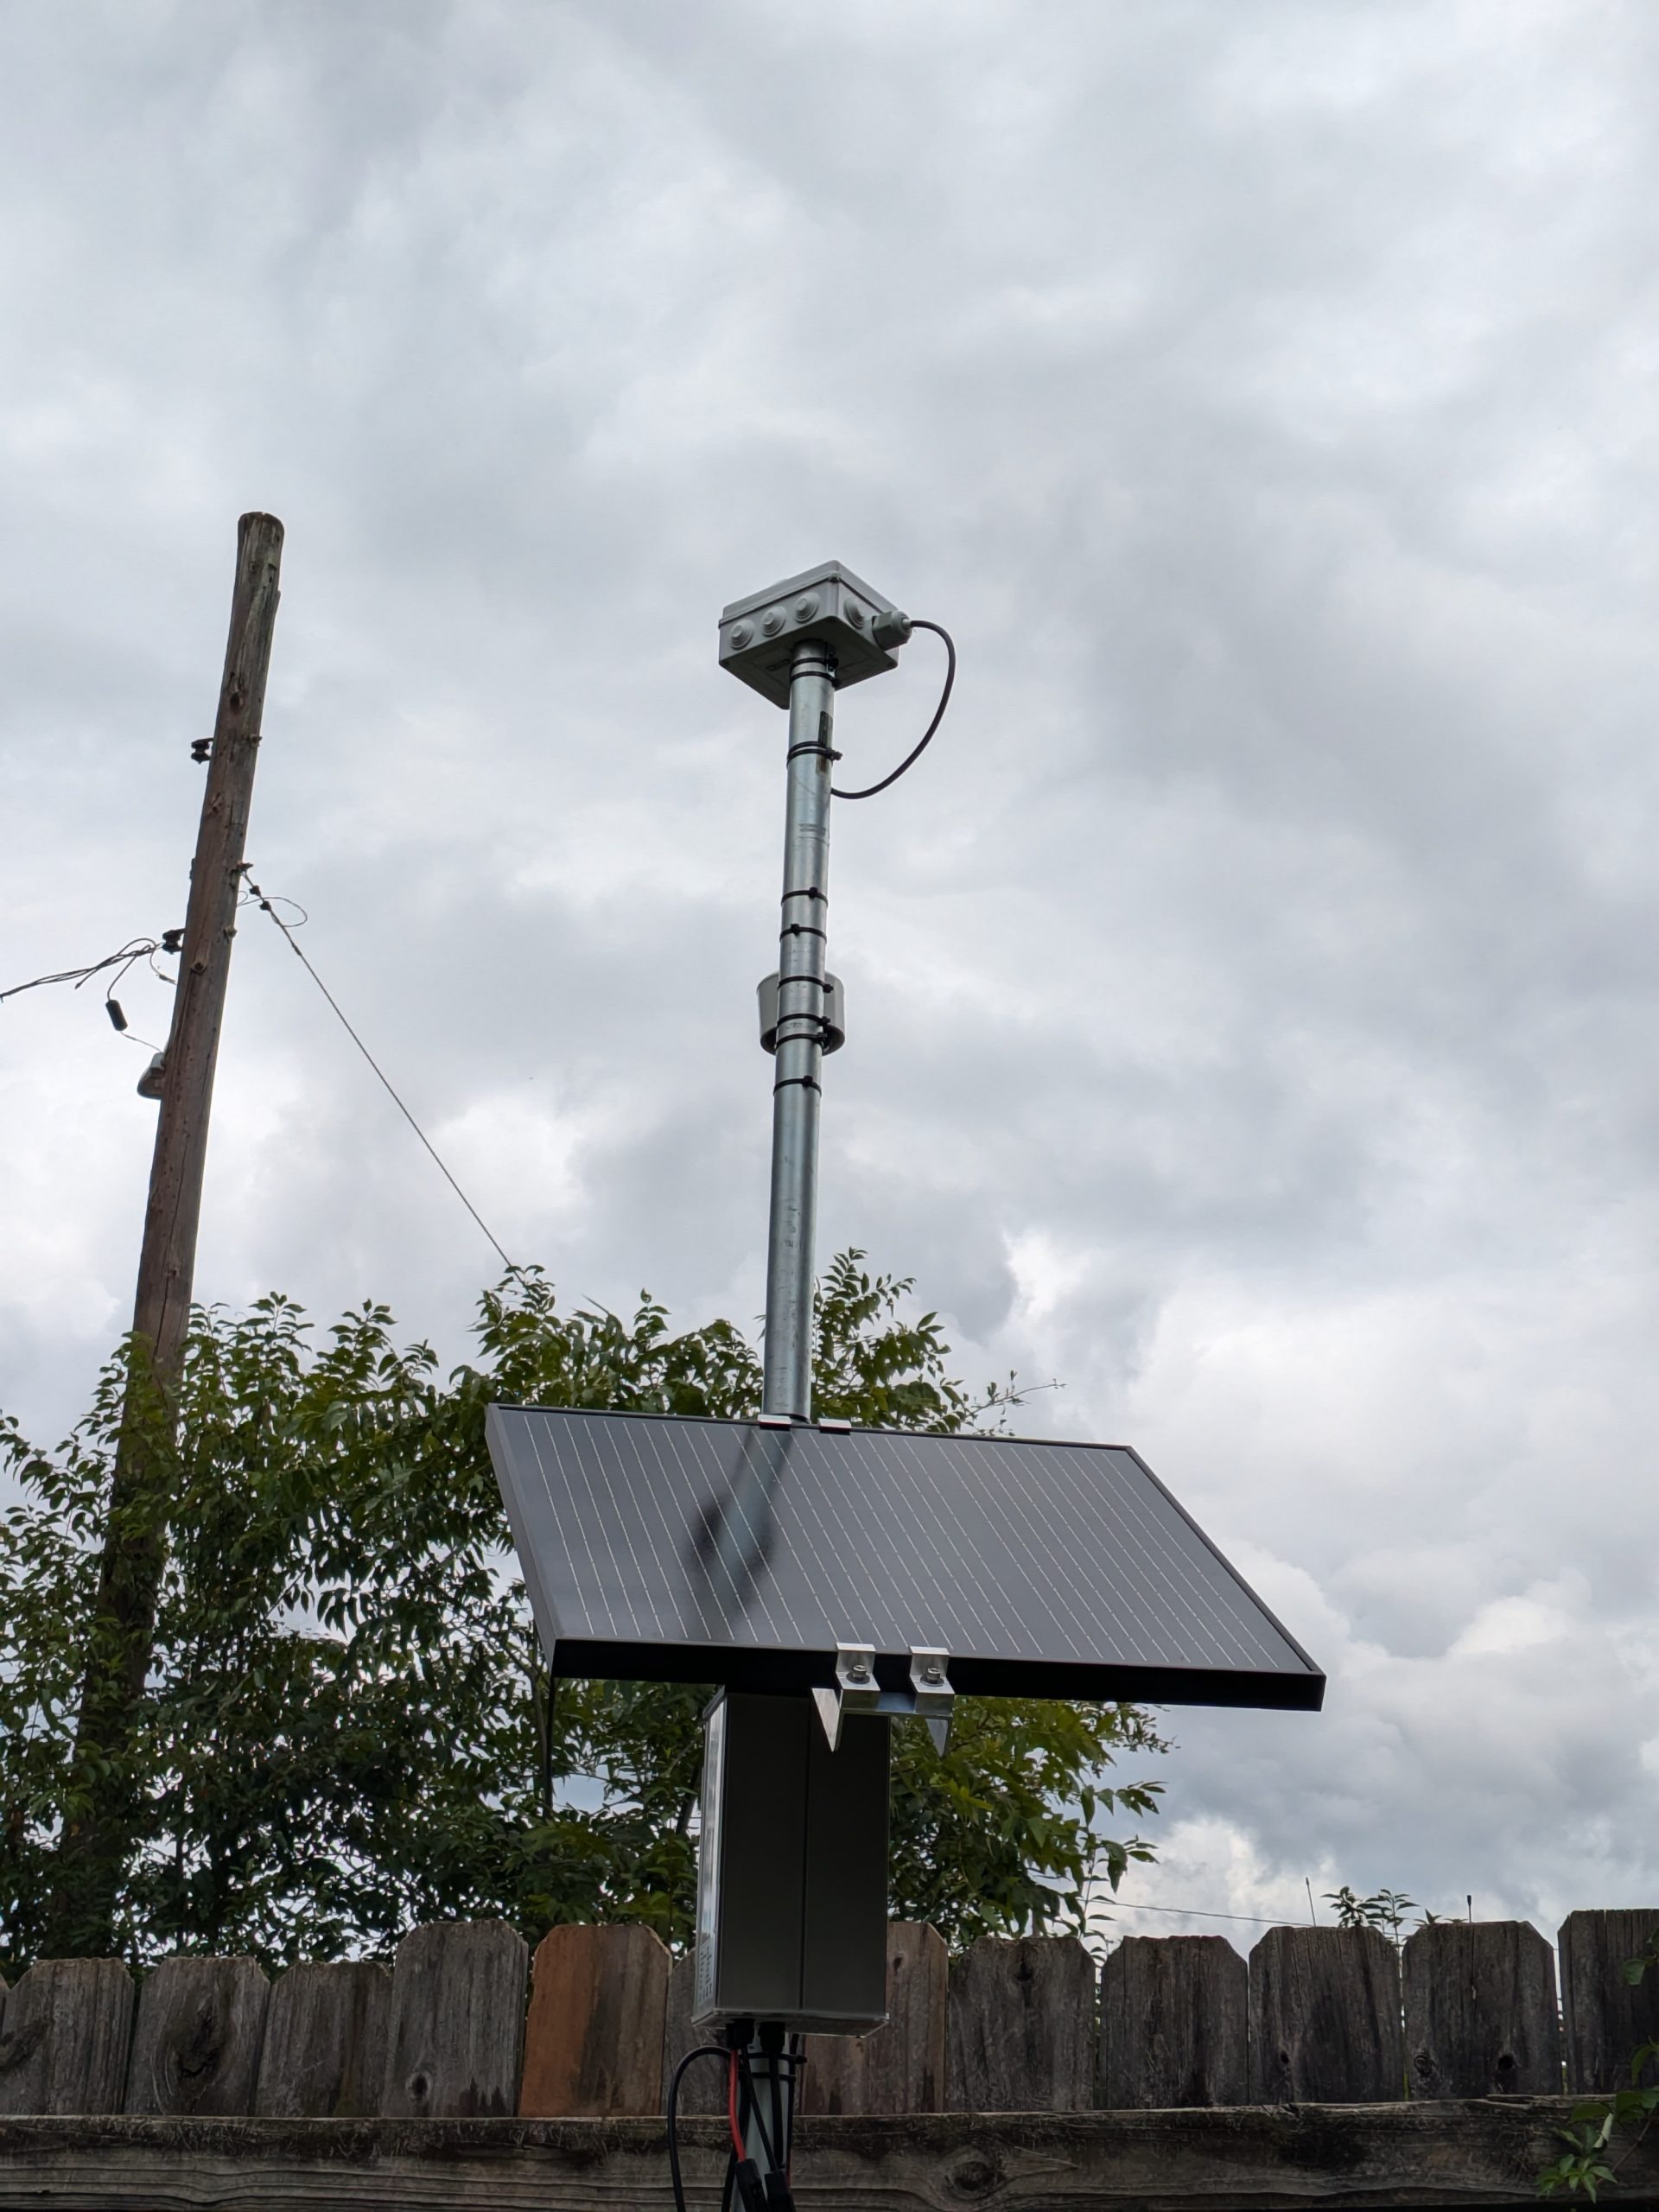
Power
We wanted the unit self-contained with no external power sources, so we needed a solar panel and battery. Testing the system with different power banks showed that a thirty-eight-watt-hour power bank would run everything for about thirty hours. Looking at the published statistics for the Raspberry Pi, that should not be right, but we went with the results of our field tests. We knew that we were also going to run an air-quality sensor on this stack, and wanting a few extra watts running across the system, we selected a Voltaic 50-watt CORE Solar Power System. More power than we needed? Probably. But I would rather have some bored electrons than brownouts. The system normally runs a 12V power out, but we asked for the optional 5V output when we ordered it. This came as a new power cable with a step-down transformer strapped to the side of it rather than anything fancy inside the battery enclosure. Because the local stores had nothing larger, we used six hose clamps to secure the battery and panel mount onto the pole. Inside the junction box, we wired a USB-C power cable to the 5V output.

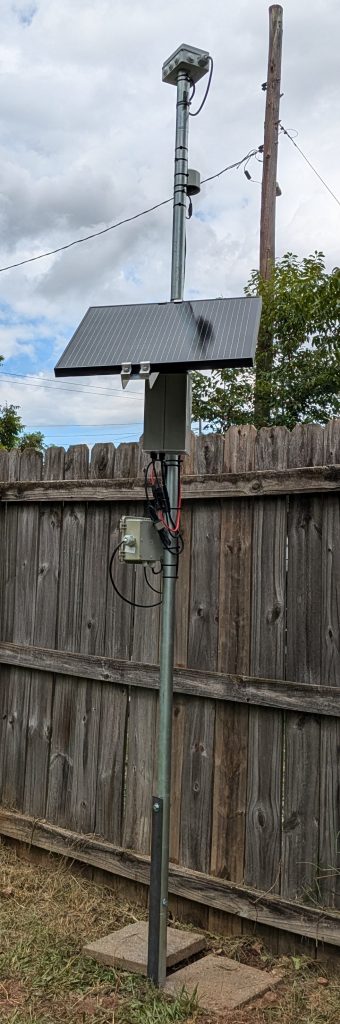
Mount
Now we have all this stuff and need to put it somewhere. The camera and Raspberry Pi weigh almost nothing, but the CORE Solar Power System adds significant heft and wind load. We decided to use a ten-foot length of metal conduit for our pole. We took a 2 in x 3/16 in x 48 in metal angle iron and hammered most of it into the ground. We notched one side of the top of the angle iron and drilled two holes in the angle iron and the conduit. Two sets of hex bolts, flat washers, and lock nuts connect the pole and the angle iron to complete the mounting. This setup allows us to raise and lower the pole easily by removing the lower bolt and pivoting the pole on the upper bolt. We used several #6-1/2in self-drilling screws and a double handful of UV-resistant cable ties to secure everything on the pole.

The Bonus.
In the middle of summer, with above-average temperatures and horrible air quality, we decided to randomly check the air quality for our area. A bit of research led us to a Purple Air Zen AQI Sensor. We took a micro-USB charging cable to supply power, lopped one end off, and tied it into the 5V power cord alongside the USB cable for the Raspberry Pi.

The result.
The entire build was a fantastic exercise. We truly enjoyed building all the discrete parts and getting the components to work together. Seeing the system run without a problem through a week of extremely heavy rain and thick clouds was very validating. Sitting comfortably inside, drinking a cup of tea, and watching the stars; bliss.
Oh, dew, we have a problem…
After a few good nights of looking at the stars, we discovered an issue. Dew. At first, we thought we saw leftover moisture on the dome from all the rain, but it would hang around too long and not vanish until the middle of the morning. Quickly, it became apparent that the condensation was from the dew, the bane of all astrophotographers and hikers who had left their rain-fly at home. (Long story, Don’t ask.) We surmised that when the Raspberry Pi lived in the camera enclosure, the heat generated was enough to warm the lens and dome. Even with the simplicity of the mount and hinge to access the camera enclosure, I did not want to flip everything over so I could access the Pi when I needed to swap out that SD Card or replace parts or whatever other maintenance we needed to complete, so we came up with another solution.
Another project we run uses a Software-Defined Radio (SDR) to track signals from aeroplanes carrying Automatic Dependent Surveillance-Broadcast (ADSB) systems. Those little SDRs get warm. What if we stuck one in the camera enclosure and tried to capture some weather satellite imagery?
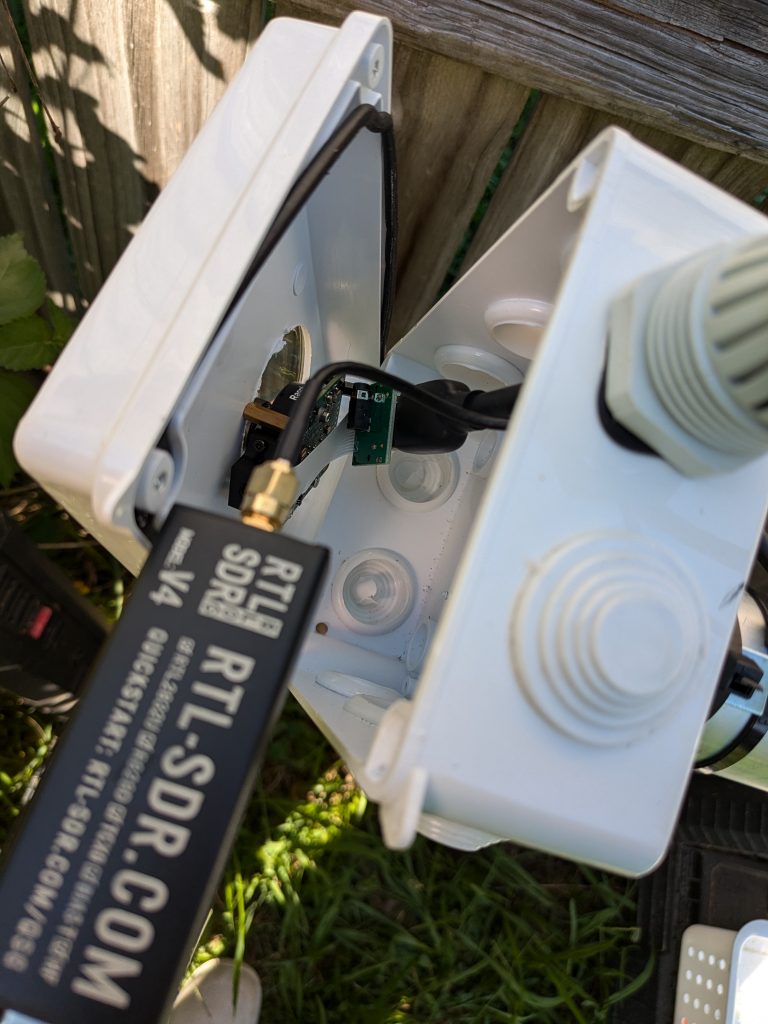
We picked up an RTL-SDR v4 and their multipurpose dipole antenna kit. Then, we lowered the pole, strapped on another ten-foot-long USB cable, and mounted the dipole just below the enclosure. We also exchanged the packet of desiccant beads, wrapped the cable gland with waterproof tape, and added another layer of glue around the camera dome. (More protection is better, yes?)

On the other end, we connected the SDR’s USB cable to the Raspberry Pi and used a 90-degree USB adaptor to give the Pi a little foot to stand on and give us a better route for the USB cable. We also wrapped the cable gland on the side with more waterproof tape and added a drain hole since we found some moisture in the bottom of the control box.
Yes, we should not have put a cable gland on the side of the control box, but there was already a hole there from when this box was used with another project, and well, it seemed like a good idea at the time.

We played with different automation systems to have the Raspberry Pi kick off the SDR during a satellite pass. Then, it would trigger a conversion of the recorded radio sounds into a picture. Guess what? It worked!
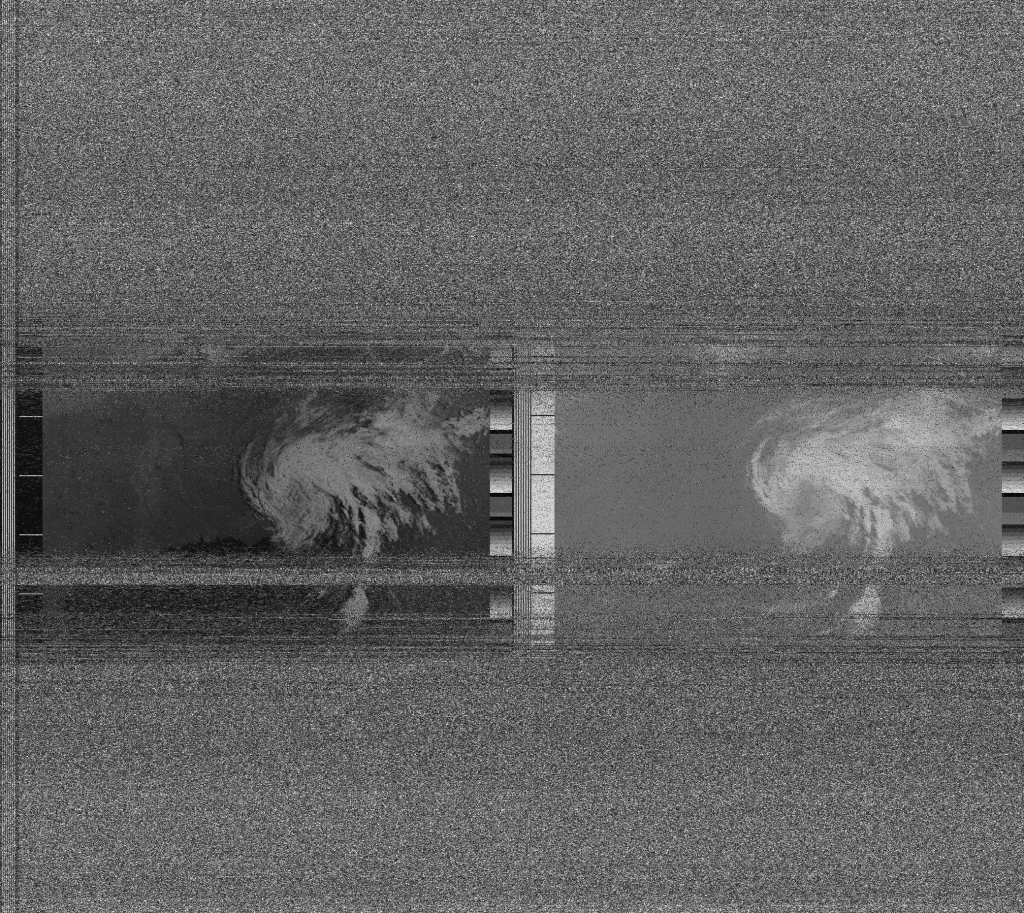
Well, getting the images worked. Sort of. I am positive we could get a better signal if we tuned things a little more with the dipole, maybe added a preamp and filter, but seeing images pulled from a satellite felt pretty good. But, as awesome as my idea was, we still have a dew problem. It (slowly) dawned on me that the satellites were whizzing overhead for eight to twelve minutes at a time with a spacing of several hours between passes, and the SDR was only turned on during those passes. Meaning it hardly had enough time to get warm. I needed a better satellite.
I scrapped the NOAA 15 satellite pass automation software and switched the SDR to listen for the geostationary GOES-East. Since there is no pass, you could set up a crontab entry to switch on and off the SDR radio so it listens every thirty minutes for the latest downlink, but we needed the SDR to heat up, so we just left the SDR running all the time. One problem: the antenna is not tuned to the correct frequency to hear GOES-East, so we do not see any imagery. Plans include a preamp and a dish-style antenna to replace the dipole.
And it worked – for weeks. Then we had sixteen days of clouds and rain and ran the battery flat. Oopsie. Now, I had to learn the crontab command and stop the SDR from using up all my power in the middle of the day. I added two lines to my cron jobs: one to kick off the SDR receiver at about 2200 local time and a second to kill the process at 0800.
I left the whole system offline for a few days to let the battery recover; then, I plugged back in the PurpleAir. After verifying that we had no dropouts after 24 hours, I plugged back in the Pi, and the system is working again as expected. I am pretty happy that our dew problem seems to be solved now.
Leave a Reply